Explore how flexible furniture in an active learning space can be set up in different layouts to enhance student learning. Use our suggestions to help with the planning of classroom activities for your students or let them inspire you to come up with layout ideas of your own.
Layout 1
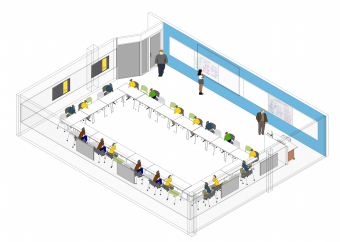
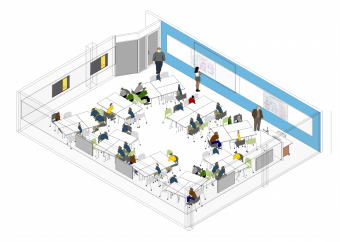
Tables and chairs are placed in a rectangle or square adjacent to each other. The middle can be left ‘hollow’ to allow the speaker(s) to move around freely and facilitate discussion, activities or even present to the group.
Great for:
- Whole group discussion
- Working on tasks or problem solving between students in close proximity
Layout 2
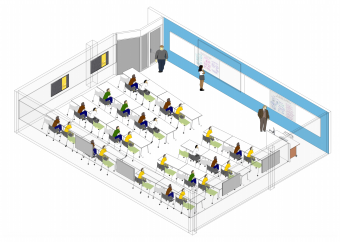
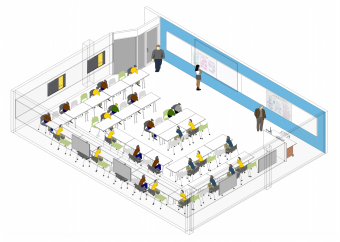
Tables and chairs are placed in rows facing the presenter’s desk and in most cases the front of the room. The group faces the central speaker(s) who stands in front of the group.
Great for:
- Presentations and demonstrations
- Discussion amongst groups of pairs: pairs can turn around to join with other pairs (i.e. small groups of 4)
- Activity based tasks where 2-3 students can participate
Layout 3
Tables and chairs are placed in rows facing the middle of the room from both sides of the room. The group can face either one central speaker or multiple speakers who stand in the middle of the group as well as each other.
Students can either sit in rows, stand up to participate in an activity or discussion in the middle of the group or move their chairs around to other desks or the middle of the room.
Great for:
- Presentations and demonstrations
- Roleplays
- ‘Fish Bowl’ discussions
- Brainstorming
- Collaboration or problem solving with multiple students
Layout 4
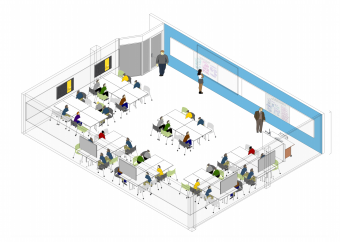
Tables and chairs are placed in groups around the room which either face the front of the room or an interactive monitor. Students themselves either face each other or an interactive monitor positioned on the wall.
The central speaker(s) can move around freely and facilitate discussion, activities or even present to the group. Content can be projected around the room on the interactive monitors and/or written up on the whiteboard(s).
Great for:
- Presentations
- Collaboration or problem solving amongst groups of pairs
- Mini Interactive Lectures
- Brainstorming
- Gallery walk
Layout 5
Tables and chairs are placed in groups around the room facing either a whiteboard or an interactive monitor. Students face both each other as well as either the central speaker standing near the whiteboard or just the interactive monitor itself.
Content can be projected on the interactive monitor and/or written up on the whiteboard(s) for the group to see. In some cases, students will also have access to a whiteboard to write on that is located next to the interactive monitor.
Great for:
- Presentations
- Gallery Walk
- Brainstorming
- Collaboration or problem solving with multiple students
Layout 6
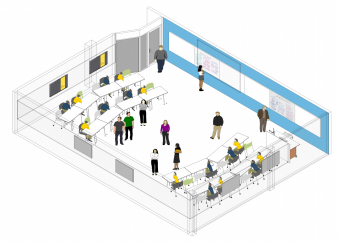
Tables and chairs are placed in rows to form a “U Shape” with some of the desks and chairs being grouped to face each other in the middle of the “U Shape”. Students can face each other as well as the central speaker(s) who can either move freely in between and around the “U shape” formation or stand in front of the group.
Content can be projected around the room on the interactive monitors and/or written up on the whiteboard(s).
Great for:
- Discussion amongst groups of pairs
- Activity based tasks where 2-3 students can participate
- Roleplays
- Mini Interactive Lectures
- Flexible group communication and interaction as chairs can be moved around to other desks to join or form groups
