Audiovisual Resources

Our audiovisual tutorial videos will teach you how to use the equipment in our physical spaces including our AMX touchscreens, document cameras, microphones, monitors and more. You can also read up on our FAQs and get in touch with our AV Technical Support team for further assistance.

Quick Start Guide


AMX Touchscreen in Rooms with One Projector

The AMX touchscreen allows you to control audiovisual equipment in CATS lecture and tutorial rooms. The guide shows you how to use the touchscreen to control the internal PC, document camera and a range of external devices. You’ll also learn how to project information onto the projector in your teaching space.

Download guide


AMX Touchscreen in Rooms with Two Projectors

The AMX Touchscreen has the capability of controlling two projectors. This guide shows you how to use the touchscreen to control the internal PC, document camera and a range of external devices. You’ll also learn how to project information onto both projectors in your teaching space.


Download guide


Collaborate Mode

Collaborate mode allows students to share their laptop with the rest of the class. The content on their laptop will display to all other monitors in the room.


Epson Document Camera

The Epson Document Camera allows you to project information onto the projection screen in your teaching space. You can place an object such as a textbook under the camera lens and display the image on the projector screen. 


Lumens Document Camera

The Lumens Document Camera allows you to project information onto the projection screen in your teaching space. You can place an object such as a textbook under the camera lens and display the image on the projector screen.


Download guide
 

Monitors in Active Learning Spaces

The monitors in active learning spaces allow students to individually work and study. The video tutorial explains how to use the monitors to display content and how to connect your own devices.


Dual Radio Microphones

Dual microphones

Key features of the Dual Radio Microphones include: 

  • physical microphone transmitters, which are located on the lectern in each of the four theatres being trialled (each set consists of one hand-held and one lapel radio mic)
  • one extra wireless microphone channel allowing for two-way interaction between students and their teacher, increasing overall student engagement in a lecture class
  • clearer audio quality, providing students with a hearing impairment the opportunity for closer collaboration with their peers and teachers, and less hearing fatigue
  • option to capture the participants' audio in Lecture Recordings+ and Hybrid Teaching Spaces.

Download the guide


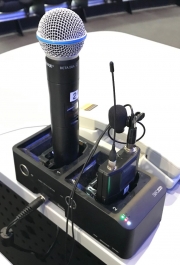
Shure SLX Series Wireless Microphone System

The Shure Microphone System produces high audio quality making verbal presentations audible throughout CATS lecture and tutorial spaces. This system works for both small and large spaces, ensuring your students can hear you from any seat.
 

Download guide

Audiovisual FAQs

The below FAQs will assist you in solving common questions with audiovisual (AV) systems in UNSW CATS spaces. If you require further assistance, please contact the Learning Environments team.

The AV system is controlled via the AMX touchscreen. If the screen is black, touch it to wake it up and press the ‘System On’ button in the bottom right-hand corner. 

Once the system has started, select the source required, e.g. computer then press the ‘Display on Projector’ button located in the centre of the screen. The AV system will automatically turn on the data projector, and the projection screen will descend. Please note that the projector may take a minute or so to warm up, so there might be a short delay before you see anything on the projector screen.

Select the ‘Volume Control’ button on the touchscreen. Check that the ‘Mute’ button is not highlighted under the ‘Source Volume’ section.  Adjust the volume to the desired level using the up and down arrows. If a microphone is installed in the teaching space, its volume can be adjusted from this page also. 

If there is still no sound from the computer, please check the computer’s volume settings by selecting Start/All Programs/Volume Control on the bottom left-hand side of the PC monitor. 

If you’re trying to project sound from a software program or website, such as VLC Media Player, YouTube or iView, please also check the software or website volume settings.

First, check that your zID and zPass have been entered correctly. The password system is case sensitive, so please ensure caps lock is not selected when you enter your password.  

If you still can’t log in, check that the cursor on your computer screen is as far to the left as possible of the dialogue box when entering your username. To do this, click on the right-hand side of the username dialogue box, press backspace until the cursor moves to the left of the dialogue box and the word ‘username’ is displayed. You may need to repeat these steps until the word ‘username’ appears in the dialogue box.

If you are in a room that houses two data projectors, it’s possible to display information from two input sources at the same time. To do this, select your first device and press the ‘Display on Projector 1’ button on your computer screen. Next, select your second device and press ‘Display on Projector 2’. Audio is attached to the projector you select last.  

For a list of our rooms equipped with two data projectors, please call extension 56639 or view Room Management (login required).

Our system is set to save power when it is not in use; when you turn the system on, the monitor should also light up. If the system is already on and the monitor is still not working, please check that the power button (located on the bottom right-hand side of the monitor) is switched on.

Our rooms are equipped with a VGA cable to connect your external laptop, and many of our rooms are also supplied with a HDMI cable to allow connection of a HDMI-equipped laptop. If your Laptop does not support these standards of connection, you may need to purchase a dongle to interface between your laptop and our system. 

To display your laptop, please select ‘VGA Laptop’ or ‘HDMI Laptop,’ depending on which connection method you are using.  

For a list of rooms that support the connection of HDMI devices, please call extension 56639.

There are four USB ports in each teaching space, located on the top of the lectern beside the laptop input plate and power outlet. Insert your USB into one of these input ports to connect it to the internal PC.